Every hunter sooner or later asks the question: "How to dress the skin of a fox." After all, the fox is the most common animal in our forests. Fox fur makes wonderful winter clothes and accessories, so a well-dressed skin is quite expensive. There are different recipes for dressing fox skins, in this article you will learn the most effective and budgetary ones.
Skinning an animal
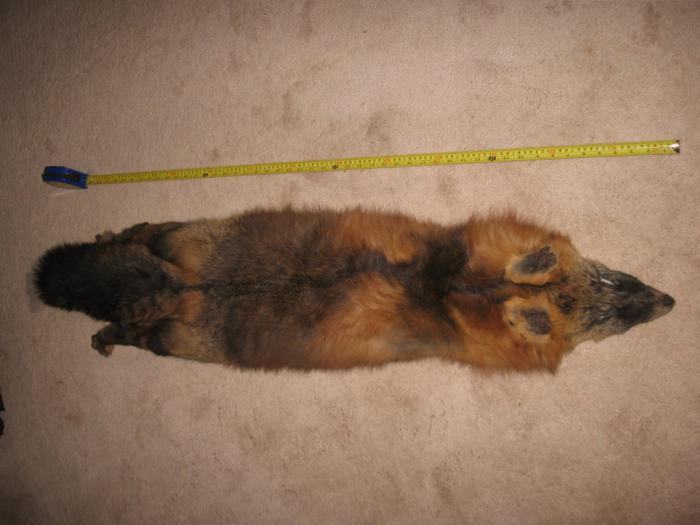
When the hunt is over, and the hunter has a couple of fox carcasses in his hands, it's time to think about how and when to remove the skin. In a fox, only its fur is valuable, so it is preferable to skin it while still in the forest. Of course, if this is your first time holding a slaughtered animal in your hands, you'd better postpone processing it until you get home, otherwise you risk wasting a lot of time.
It is important not to damage the skin, and leave the paws, head and tail intact, so you need to remove it in a way called a “tube”.
So, how do you skin a fox?
- Put the dead fox on its back and spread its hind and front legs to the sides.
- Make an incision from the beginning of the fingers of one hind paw to the beginning of the fingers of the other, crossing the anus.
- Cut the carcass with a knife from the tip of the tail to the intersection with an incision between the paws.
- Cut the skin on the front paws from the elbow to the base of the toes.
- Gently slipping your fingers between the skin and meat of the fox, and cutting off the tendons, slowly remove the skin to the head. Be especially careful in the abdomen, where the skin is especially delicate.
- Having reached the head, pull the skin to the ears and cut off the cartilage at the base, cut the eyelids and tighten the skin to the very nose, in order to finally separate the skin from the carcass, cut off the tip of the nose from the inside so that it remains in the skin. Remove ear cartilage.
It is important to get fur without any holes, and not just like skinning a fox. But if in the process of skinning you still made flaws, sew them up.
Rub the skin with coarse salt and leave to dry for two days.
soaking
To make it easier to degrease the skin, after it dries, it must be soaked for a while in a special solution. Dressing fox skins at home is slightly different from the industrial one. To produce high-quality soaking of the material, you will need fairly simple components.

The processing of the fox skin during the soaking process is as follows:
In a sufficiently large container, you need to prepare a solution based on a liter of water with a temperature of about 25 degrees: 1 tbsp. l. salt (stir until completely dissolved), mix with 1 tsp. detergent, an incomplete tablespoon of vinegar essence and two tablets of furacilin.
Place the skins in a container with a solution. For the first two hours, every fifteen minutes, the contents of the container must be stirred with a stick with a rounded end, so as not to perforate the skin and not damage the fur (if the container is small, tongs for cooking clothes are perfect). Then it is enough to stir the skins every three hours. The optimal soaking time is 12 hours. The degree of readiness is judged by the head and paws. In finished skins, they are soft, as if they had just been separated from the body. And if after 12 hours the soaked skins are not ready, the solution is drained, continuing the soaking in the freshly prepared mixture.
Wash
To wash the skin of a fox, it is best, but some use washing powder.
In a large amount of cool water, beat the soap into a strong foam, rinse the carcass well and leave it to get wet for twenty minutes, then rinse it in clean cool water.
Mezdrenie
Dressing the skin of a fox requires obligatory skinning. Skinning is the cleansing of the skin from the remaining subcutaneous fat and meat. After proper cleansing of fat, the skins become soft, tender and pleasant to the touch from the inside.
The process of skinning requires quite a lot of experience and concentration, therefore, asking the question “where to dress the fox skin?”, You should try to find a person familiar with this process who can control your first work. Treat this stage of work most responsibly, since it is during skinning that skins are most often spoiled. Each animal has its own skin thickness, and they need to be cleaned of fat and meat with different intensity and pressure, if you overdo it a little, and all the fur will fall out. Who needs a fox without fur?

For skinning at home, it is best to use a convex wooden board, stretching the skin over it. In the absence of such, this stage can be done on your own knees, wearing old clothes and covering yourself with oilcloth.
When skinning from the inside of the skin with a blunt knife tilted at an angle of 45 degrees, films, fat and meat are scraped off. And you need to do this only in the direction from the tail to the head, otherwise you will leave unnecessary cuts on the skin. From a well-soaked fox, fat should be removed with ease, if this is not the case, the soaking process should be repeated.
Pickling or pickling?
Both fermentation and pickling are very important stages, without which not a single dressing of fox skins at home can do. These processes change the structure of the protein, due to which the skins become soft and pliable, stretch well and do not tear.
It is believed that fermentation has a better effect on the quality of the skin than pickling. Really live bacteria act on tissues more sparingly. But because of its high cost and unbearable smell in home dressing, this method is rarely used. In addition, this option for dressing the skin is longer.
The pickling recipe is:
For two liters of warm (not hot !!!) water, 0.5 kg of coarsely ground oatmeal or rye flour is taken, 60. salt, 15 g and 1 g of soda. The skin is placed in a cool mixture and left to ferment for 48 hours. Periodically, the solution must be stirred.

Pickling, although considered a lower quality method of processing hides, has a number of advantages. For example, in a solution of chemical acids, the skin comes to readiness much faster, there is no unpleasant odor. So the choice is yours.
For pickling, mix 2 liters of water with 100 ml and 2 tbsp. l. salt. In such a solution, the skin should lie for no more than a day, although seven hours is usually enough.
Checking the readiness of the skins
There are several ways to check the skin for readiness.
- Pinch test.
A few hairs are pulled out from the lower abdomen of the fox, if they are easily separated, the skin is ready.
- Dryer test.
Bend the skin several times, if an imprint remains on the skin, it is ready.
- Peel off a strip of the top layer of leather.
If the piece comes off easily, then the skin can be removed.
After pickling, in order to neutralize the acid, the skin is placed for half an hour in a soda solution (1 gram of soda is needed for 1 liter of water). Then it is left to dry under pressure for a day.
Tanning
For fox skins, tanning is necessary. It will help protect fox clothing from external adverse factors.

There are many recipes for how to dress a fox skin (tan). Here are two of them.
- Fill a large saucepan to the top with willow bark, cover with water and boil for about 40 minutes. Then strain the broth and add salt there (st. L. Salt per 1 liter of broth).
Apply the finished cooled solution several times with a brush or sponge on the skin of the skin. Roll the skin up with the skin outward and leave to dry.
- For 1 liter of warm water you need to take: 2 tbsp. l. salt, tanning agent mixed with water, (according to instructions) 1 tsp. and hyposulfite 1 tsp. Load the skins into a container with a tanning composition and leave for a day.
Drying
Dressing fox skins at home is a tedious task. The plasticity of the skin will depend on drying. The skins are dried on the rule, constantly removing it and stretching it in different directions. When the skin turns white and becomes tender, the skin can be left to dry, and then the skin is treated with fine-grained

Fattening
So that the skin is not too dry, it will have to be burned. For a liter of water, take 100 g of soap, 1 kg. fish or pork fat, and 20 g of ammonia. Wipe the merezda with this mixture, and let it dry for a couple of hours.
Everything, the skin is ready!
How to make a fox skin at home for export?
"If you tried to make
Fox Skins But You Haven't Got It All The Time So Give Me 6 Hours And 18 Minutes And I How To Do This Job
Qualitatively and Without Mistakes!
"32 VIDEO LESSONS THAT REVEAL ALL THE SECRETS OF FOX SKIN MANUFACTURING THAT I ACCUMULATED OVER THE YEARS OF MY PRACTICE!"
Dear novice furrier!
Did you know that, according to statistics, up to 80% of beginners in this business fail and give up this venture forever?
Do you know what is the main reason for failure?
No, not in the absence of knowledge about the dressing process and its sequence.
And not even in the absence of motivation - for many this is already a passed stage, and they are just burning with the desire to find out this secret after all!
In fact, the main reason has been known for a long time - these are PRACTICAL DIFFICULTIES! Just think about these numbers: 8 out of 10 novice furriers fail because of the practical side of things!
Where to begin?
In any work there are subtleties and some difficulties. So in dressing fur, there are moments, some little things, without knowing which, you will not achieve good results. But they can be overcome if you do not follow the “poke method”, but follow the advice of those who have already passed this path.
You can independently get to work, study all kinds of literature, consider many recipes. At the same time, you will spend a lot of time, master the theory of dressing perfectly, but you will not have practical skills, exactly everything that I had to master by trial and error for a long time. All this will cost you not only the time spent, but also misses in the initial stage. Wouldn't it be better to trust one specialist who will guide you through and through, providing comprehensive information about dressing skins at home.
If you are interested and want to save your time, I will help you with this and reveal in detail all the secrets of fur and leather dressing.
I tried to present all my many years of experience in detail in my training video course. Previously, there was nothing of this, everything had to be collected bit by bit, so many mistakes were made, and, of course, it was not without losses either. That is why I decided to make something like a guide for beginners.
In my training video, I described in detail, including the most necessary little things, the whole technology of dressing fox skins at home. Having studied it, you will greatly facilitate your work, save money and time.
I'm happy to introduce it to you:
"The dressing of fox skins at home»
After you paste DVD discs into your drive, on the monitor screen you will see:
What is hidden behind each of the sections, read on. The following is a brief description of the knowledge that you will receive by passing this or that section.
SO, LET'S CONSIDER THE FIRST DISK:
THEORY
The first disc presents you with purely theoretical information. It includes four sections, each of which contains lessons, supported by practical videos. Each of the sections is an important element of knowledge, without which there is simply no point in starting the practical part!
So, let's consider what video lessons include these sections:
SECTION 1. FUR RAW
| What do you need to know about raw materials? ................................................................................................ | 03:39 min. | |
| The structure of the skin. ............................................................... | 02:01 min. | |
| Primary processing of fur raw materials. ......................................... | 12:17 min. | |
| Storage and conservation of skins. ................................................................................ | 08:30 min. |
SECTION 2. HIDING
PART 1 |
||
| Party assembly. ............................................................................... | 05:10 min. | |
| Soak off. .................................................................................................................... ... | 17:55 min. | |
| Methods for soaking skins. ................................................................................................ | 22:19 min. | |
| Mezdrenie. .................................................................................................................. | 16:27 min. | |
| Degreasing. ................................................................................................................. | 15:55 min. | |
PART 2 |
||
| Pickling skins. ............................................................................................... | 34:57 min. | |
| Pickling skins. ................................................................................................................ | 04:23 min. | |
| Skin tanning. ................................................................................................................ | 32:41 min. | |
| Fatting skins. ................................................................................................................ | 13:16 min. | |
| Drying skins. ................................................................................................................ | 13:30 min. | |
SECTION 3. FINISHING
| Finishing and washing skins. ............................................................................................... | 09:00 min. | |
| Consolidation of the material covered. ................................................................ | 04:07 min. | |
| What to watch out for when dressing skins. ............................................... | 04:06 min. | |
| Production of chromium extract. ......................................................................... | 09:50 min. | |
| Basic chemicals for tanning ....................................................................... | 09:12 min. |
SECTION 4. HIDING RECIPES
ADDITIONAL MATERIALS
LET'S CONSIDER THE SECOND DISC:
PRACTICE
Second disc- focused exclusively on practice! You will see all
skinning process foxes
!
FOX SKIN TREATMENT
In this section, you will have access to 8 detailed video lessons, About
how to dress fox skins.
|
In this tutorial you will see the whole process of processing fresh fox skins. You will learn which device is the easiest to perform primary processing, what you should beware of and how to properly preserve processed fox skins. |
|
You will have access to the whole process of soaking fox skins, with a detailed explanation of why it is needed, what substances are used to soak dry skins and in what proportion they should be used. You will see the importance of mechanical action, temperature conditions and the time the skins are soaked. |
|
Skinning is the removal of subcutaneous tissue, as well as muscle and fat layers, which are not only not needed in dressed skins, but are also harmful, since they make it difficult for chemicals to penetrate deep into the dermis during dressing. On the example of fox skins, you will see the whole process of skinning, how to produce it, what devices and what you should beware of in the first place. |
|
After skinning, the skins need to be better degreased, and for this they need to be well washed using detergents and degreasers. In this lesson, you will see what detergents and degreasers should be used, what proportions should be maintained, what temperature and mechanical conditions will give the maximum effect for degreasing fox skins. |
|
In this lesson, you will see how fox skins are pickled, what acid is most effective for these skins, what proportions and time regime are used, what happens to the skins at the time of picking, what mechanical action is needed and much more. You will also learn what it is to check the skin by “pinch” and personally see the “drying” effect, which means the end of the pickling process. LESSON 8. Drying and kneading fox skins On the example of a fox, you will see the final process of dressing skins, drying and kneading. All about the visual control of drying skins, at what point it is necessary to knead, how to finish the skin and what can happen if this process is not done in time. |


Everything you need to know for dressing skins at home, without any loss, I tried to present and show in my video lessons to the smallest detail from beginning to end. So, after carefully studying the entire video course, you will be able to start working on your own.
Your success will be guaranteed!
"The dressing of fox skins at home»
As you can see, I tried to give out as much information as possible, which is so necessary for a novice skinning master at home.
and all this on two DVD discs!
Are there any guarantees?
If you have such a question in your head, then know that for all your courses, including the course "Fox skin dressing at home" I am giving TWO WARRANTY:
First:
100% money back guarantee for 365 days!
I am Yurko Pavel Trofimovich, the author of the course "Tailoring fox skins at home" I guarantee you that if after completing this course you still do not learn how to make fox skins, then I will return all the money spent to you.
To take advantage of the warranty, return the disc and email me at [email protected] .
Attach a brief description of what you did in the course with your application!
Second: 100% guaranteed course delivery in perfect condition.
If you want to order a video course and think that the course will come in a damaged form, then you can safely cast aside all doubts.
For the transportation of all our courses, we use reliable corrugated cardboard boxes. The disc is under double protection from external influences and is rigidly fixed inside the box.
But even if for some unbelievable reason the course arrives in an unusable condition, just let me know and I will send you the course again at my own expense.
As you can see, you risk nothing. I am absolutely sure that you will achieve the result that you need.
09/09/2013 | An old skinning recipe: How to skin a skin
Skinning recipe: How to skin a skin
Many hunters, having obtained a trophy, think about its preservation in the form of a skin. However, not everyone knows the recipe for dressing skins and often wonders: how to dress the skin so that it looks beautiful and pleasant to the touch? Carefully read the old simple recipe for skinning and your trophies will delight you for a long time.

Skin dressing begins with soaking
Very strongly salted and dried skin is first soaked and rinsed. Then they start soaking in the solution. The skin during soaking in water should float freely, and a 4-6 cm layer of liquid is needed above it. The volume of water that is used for soaking must be measured, because. exactly the same amount of solutions will be required for future processes:
- pickling (fermentation);
- tanning.
The skin contains a lot of bacteria, which in the solution multiply at a tremendous speed. To destroy them, antiseptics are introduced into the cleaning solution.
Recipe for cleaning solution for dressing skins
For 1 liter of water, add 40-50 g of table salt (a tablespoon), 0.5-1 ml of formalin or 1-2 tablets of sulfidine (norsulfazol, furacilin or tetracycline). In addition, you can add a decoction of oak, willow, birch or eucalyptus leaves to the water (0.5 l of decoction per 10 liters of water).
Usually the skin soaks (becomes like a steam room) in 12 hours. If this does not happen, it is again placed in a fresh solution.
The next stage of dressing the skin is skinning
The skin dressing recipe recommends scraping skin turned inside out with the hair inside and put on a wooden block (board, smooth log, conical frame of thick poles) with a blunt knife (the reverse side of a hacksaw blade or a steel brush), removing the remnants of meat, fat and removing films. The direction of movement of the scraper is from the tail to the head, while the side parts are scabbed - from the ridge to the stomach. The skin is stretched tightly without folds, but without stretching too much. If any skin is clearly oily, then it can be washed after skinning in a good powder or soapy solution of laundry soap. Do not rub the soap on the skin so that there are no undissolved pieces of soap left. After washing, rinse thoroughly and rinse the mezra and fur with clean water.
The next stage of dressing skins - fermentation
(classical dressing method), which was previously used for all types of fur raw materials.
Recipe for fermented solution for dressing skins
Fermented solution is prepared in a glass or enamel bowl / For each liter of hot water:
- stir 200 g (faceted glass) coarse rye or oat flour;
- 20-30 g of table salt (incomplete teaspoon);
- 0.5 g of drinking soda (on the tip of a knife);
- when the solution cools down to 28-30 degrees, 7 g of yeast (steamed as for yeast dough).
After cooking, put the fermented solution in a warm place. It is good to make kvass in advance, at least a day in advance, so that it will take "(fermented). This is determined by the bubbles of the released air.
According to the dressing recipe, the skin is immersed in a cooled solution for about 2 days. For 1 kilogram of the mass of paired skins, 3 liters of fermented solution are required. The skins must be turned over more often, and kvass must be stirred so that a film does not form on its surface and it does not rot.
The fermentation (picking) process can last from 5 hours to 4 days and depends on the quality of raw materials, room temperature, age of the animal, its sex, disinfection conditions, etc. The warmer the kvass, the faster the fermentation. But you can not heat above 38 degrees. Yeast fungus dies.
To determine the end of the process, the skins, while stirring in the solution, need to knead a little and try to dry or pinch. The removed skin must be bent near the groin four times with the skin up (into the pig's ear), tightly squeeze the corner, run a fingernail along the rib and release. If a white strip (dryer) remains in place of the scratch and gradually disappears, the skin is ready. For the same purpose, you can try on a pinch: in the groin area, hairs are pulled out and, if this can be done without much effort (with a slight crackle), it is time to finish pickling (picking). Every skin has its time. In solution, the skin is better underexposed than overexposed. We can say that in an overexposed skin (in the groin), the fur crawls out rather than pulls out. But if brought to such a state, do not throw it away. The dorsal part, as a rule, is preserved, but the next stage should be reduced by 3-4 times.
The next operation of dressing skins - lying
The skins ripened in pickel (kvass) are slightly squeezed, stacked with a hair up, covered with thick plywood or a board, and a load (for example, a bucket of water) is placed on top. The bedding lasts a day or two, at which time the skin ripens. The main thing during the sojourn is to squeeze out excess moisture from the skin, and the one that remains in it with the pickle just brings it to the condition. If the skin is one, then just fold it in half.
After lying down, you need to remove the remaining acid on the hairline, which can interfere with subsequent processes. Therefore, then it is neutralized within 20-60 minutes:
- or a solution of baking soda - 1-1.5 g / l
- or hyposulfite solution - 10 g/l (in b/w photography it is used as a fixer).
After neutralization, it is better to rinse the skins with clean water.
The next skinning operation is tanning
Tannin tanning is carried out in a decoction of willow bark. Oak bark strongly tightens the skin, which becomes more rigid, and also slightly stains the mezra and hair in a yellowish color. Willow bark is better.
To prepare a decoction, put the bark together with small branches, without tamping, in a bowl, pour water and boil for half an hour. Drain the broth, add 50-60 g of salt to 1 liter of solution and cool to room temperature.
The tanning agent is prepared in advance and the skin is kept in it from 12 hours to 4 days. Its quality can be improved by adding to 10 liters of willow decoction 2-2.5 liters of decoction of horse sorrel roots, prepared in the same way as described above.
Overexposure during tanning is undesirable, and therefore its end is determined as follows (in the groin area): after slightly squeezing (stretching a section of the groin area between the fingers), a small piece of skin is cut off or an incision is made. And on the cut under a magnifying glass, they consider how deeply the tanning agent (yellow) penetrated the skin. The process ends when it is completely impregnated.
The last stage of skinning is greasing.
According to all recipes for dressing skins, greasing is a must, because it makes the skin softer and increases its water resistance.
The recipe for a fat emulsion to finish dressing skins can be done in the following ways:
- mix and then beat well glycerin with egg yolk (1: 1);
- dissolve 50 g of soap in 0.5 l of boiling water and, while stirring, pour in 0.5 l of animal or fish oil, stir and add 5-10 ml of ammonia.
The emulsion is applied to the mezdra with a brush or swab. Then the skins are folded for a 3-4-hour soak, folded in half, skin to skin or hair up on some surface. It is advisable not to stain the fur, so as not to clean it later. After that, they are hung and dried at room temperature.
As the skins begin to dry out, they need to be kneaded and stretched in different directions. After complete drying, they need to be thoroughly wrinkled. Then the hair is combed, and the mezra is rubbed with chalk or tooth powder (they absorb excess fat and give it a pleasant white color) and treated with sandpaper. In conclusion, the skin is beaten out, dominated and the hairline is finally combed.
Here is such a simple old Siberian skin dressing technology, such a skin dressing recipe is useful to every hunter. In this way, I processed the skins of muskrats, martens, foxes and rabbits. The quality is very high, and the skins are strong and durable. Hares need to be chased away very quickly. Painfully thin.
Gennady Bannikov (G.)
Properly dressed skins are a guarantee that the fur product will be sewn qualitatively and will have a long service life. The reagents used in the work are dangerous to human health, so failure to follow safety rules can lead to unpleasant consequences. There are many simple and affordable ways to dress. The main task is to maintain good quality fur.
 Skins after processing should be convenient for cutting and sewing products. How to make skins suitable, for example, for a hat or collar? Conditionally, the work should be divided into stages:
- preparation of raw materials;
- directly dressing skins;
- final finishing.
After cutting the animal carcass, the skin is preliminarily rid of excess meat and fat. As the raw material cools, it is necessary to sprinkle with table salt to draw out moisture. After a few days, sometimes weeks, the skin becomes dry and brittle.
With a large number of specimens for processing, they must be sorted according to the size and thickness of the skin layer into different groups. This is necessary in order to it was more convenient to process products. All material is weighed to determine the amount of chemicals needed for dressing. Tanning is necessary in order to obtain a thin and soft raw material for subsequent work with it. If the fur does not shed, this is a sign of good quality.
soaking
 Skin dressing should begin with soaking which needs to be done twice. In the first stage, the skins are kept in clean cold water for about four hours. Then they are immersed for 12 hours in salt water. The solution is made in the following proportion: for 1 liter of water - 20 grams of salt. For 1 kg of skins, 8 liters of solution are required. For pair skins that have just been removed, it is sufficient to fulfill only the first condition.
If the process went correctly, then the material after soaking should be elastic and the subcutaneous layer should be well separated from it. If this is not observed, then you need to re-soak the skins in a solution of sodium chloride. To avoid decay, do not prolong this process for a long time.
There is another way of soaking: an antiseptic is added to the solution to prevent the growth of bacteria that cause decay. In this case, for 10 liters of water, you need to take 0.5 kilograms of salt and 6 tablets of furacilin. Sometimes it is advised to use detergents without biologically active and aggressive substances for the unhindered removal of mezdra and excess dirt.
Removal of the core
 Mezdrenie - is the removal of the subcutaneous layer. Pulling the skin on the rule, the core is carefully removed or cut off with a sharp knife. It is good to use a rotating disc cutter. It is suitable for products with a thick core. This operation at home should be carried out with caution in order to avoid damage to the hair follicles and fur, which are located in the thickness of the skin.
From thick skins, processing allows cutting off thickenings on the ridge. Without a certain skill, the integrity of the skin can be damaged, so this action should be carefully and carefully carried out. The process of cutting the mezra is carried out from the tail to the head and, if necessary, a thick layer is removed from the center to the edges, while trying to achieve a uniform thickness of the entire panel.
- a rather crucial moment in dressing fur and requires accuracy and clarity.
The next step in dressing skins at home, the material should be washed well in warm soapy water. You can use regular shampoo or dishwashing detergent. This stage will be the final one in the process of skinning.
Pickling
 Another point of processing at home - picking. It serves to change the structure of the skin. At this time, the process of loosening the collagen fibers of the skin occurs. It becomes loose and soft, but loses its strength.
The skins are placed in a solution prepared according to the following recipe: 15 grams of acetic acid and 4 grams of NaCl are taken per liter of warm water (about 35 degrees). Dive time is 6 to 12 hours. Workpieces must be periodically stirred for uniform processing. If a white strip appears when squeezing, then the skins are ready for further action. After pickling, they are stacked in piles and aged for a day. And also, instead of a similar procedure, fermentation can be carried out in a solution of barley or oatmeal.
Some pickle recipes:
Oatmeal (amount of 200 grams) is stirred in 1 liter of hot water until a homogeneous state is obtained and 30 grams of table salt are poured. 7 grams of yeast and a teaspoon of soda are added to the cooled mixture. Skins are placed in the cooled solution.
Another recipe using oatmeal: 750 grams of powdered oats are stirred in one liter of water with the addition of kefir. The mixture is infused in a warm state (about 40 degrees) for 12 hours. Add water and salt (about 50 grams per 1 liter). The skins are poured with the resulting composition and kept at a temperature of 40 degrees.
Neutralization
To do this, prepare a soda solution in the proportion of 10 grams per liter. The skins must be kept in it for half an hour in order to create a neutral environment. An alkaline solution of baking soda, when interacting with an acid, will create favorable conditions. The smell of acid will dissipate. The material must be put on ripening, turning the skins with fur outward and laying in a pile under the load for 12 hours. The weight of the press should lie in the range of 5-7 kilograms. Instead of neutralizing, you can simply rinse the skins thoroughly with water.
Tanning
 In order for the fur to become resistant to moisture, the skins tanned. For this, chromium sulfate is used. To prepare an aqueous solution for one liter of water, take 1.5 grams of chromium oxide. The water temperature should be 40 degrees. After keeping the skins in this liquid for 6 hours, stirring occasionally, remove and dry. Chromium oxide replacement options: chromium or aluminum alum. Natural substances containing tannins are very popular for tanning. Plant materials can be:
- branches of willow or alder;
- oak bark;
- nettle leaves;
- wild rosemary.
To prepare a similar composition, take 250 g of crushed natural ingredients. It can be, for example, oak or alder bark, for example. 60 g of salt are added to them and diluted in 1 liter of water. After boiling for 30 minutes, the solution is subjected to cooling and filtering. The skins are immersed and kept with stirring for 6 hours until they are saturated with the solution.
Fattening
 Zhirovku performed to ensure softness, in order to facilitate cutting and sewing. In addition, additional shine is given to the fur. To properly perform this procedure, you need to take 50 grams of fish oil and the same amount of laundry soap and pour them with about one and a half glasses of warm water
For greasing, the skin is stretched on the rule with the fur inside and the solution is applied with a brush. Drying is done at room temperature.
And also for fattening, you can use a mixture of glycerin, salt and ammonia, diluted in 1 liter of water.
Final finishing
 Fur for tailoring should have a marketable, beautiful and certainly lush appearance. The friability of the hairline is the main factor that the dressing was done correctly, in compliance with all technological processes. The softness and plasticity of the skin is achieved by grinding with fine sandpaper or abrasive. To make the hairline shine, it is processed with hardwood sawdust. pile needed comb to make it lush and attractive.
Dressing of mink skins
 Incredibly beautiful mink products, but finished items have a high cost. It is profitable to grow these animals for the purpose of selling fur. The dressing of mink skins is no different from the technology of processing the skins of other animals. The process has the following steps:
- primary processing;
- soaking;
- mezdrenie;
- the washing up;
- picking;
- fattening;
- finishing processing.
If the skins cannot be dressed immediately, then they must be immediately preserved. For this purpose, the raw material is stretched on the rule, which must be stretched with a horizontal crossbar. The edge of the skin is slightly stretched in order to avoid the formation of unnecessary folds and creases that spoil the fur.
The resulting structure should be stored in a room where the humidity is average. The ambient temperature must not fall below zero. With high humidity, the skins are prone to mold, which will negatively affect the quality of the fur. In dry rooms, there is a possibility of acquiring excessive fragility and brittleness. Insect repellent chemicals or natural fragrances such as orange peels or lavender bunches should be placed near the workpieces to prevent moths from appearing.
Conclusion
It is not so difficult to achieve a good result in dressing skins, although this process is long and laborious. As in any business, patience, accuracy and strict adherence to technological processes and their alternation are needed here. If you try, all this will lead to a positive result.
Attention, only TODAY!
The skin of the fox is very soft, it can be easily processed. Even a novice can handle this matter if he pays attention to all skinning operations. 80% of inexperienced furriers fail on their first try and don't continue with the job.
The main reason for failures is practical difficulties. If someone has a fox skin in store, there is a desire and interest to work on it, then continue to carefully read this article. In it, in a profitable form, the secrets of how the fox skin is made without leaving home are revealed.
Getting started with skinning
Whatever work you do, each of them has its own characteristics, each is complex in its own way. This is how it is with fur dressing, there are also some nuances here, it would seem trifles, but without them the desired results will not have to be achieved. All these difficulties can be overcome if you acquire knowledge and do not ignore the advice of those who are already on the right path.
Of course, now there is no shortage in the literature, with the help of the recipes presented, you can independently begin to deal with skinning at home. But this is only a theory, but practical skills are needed that will help you avoid mistakes at the beginning of work, save money and time. To make it easier, you can find a video on the Internet and see how skinning is carried out.
Before you start dressing a fox skin, you need to find out what kind of predator it is from: a wild one that lived in the wild or carefully and carefully grown on a farm in a cage. If the skins are taken from wild-caught fur-bearing animals, they are very dirty. In addition, the red predator, which lives in forests and fields, has a large number of burrs on its fur, and it will take a lot of time and be very diligent to free them.
Heavily polluted places should not be cut, it is strictly forbidden to comb out the burdock with metal brushes. You should try to keep every single hair on the skin. Foxes grown at home have a skin without the above disadvantages. So the preliminary work will take a little time.
Skins from a shot fox have holes from buckshot, fur with traces of blood. Such a skin that has just been removed must be washed before beginning the dressing. You can wash it like you would your normal clothes by selecting the appropriate mode in the washer. As a detergent, take the usual washing powder or another suitable product. Water should be at room temperature.
To mend the skin of a fox at home, a novice furrier will need: detergents, kitchen, the most common salt, vinegar essence, a rule made of wood. You can’t do without tannins, without fish oil, and also without ammonia, a knife, pumice and a brush.
soaking
Without such an important stage of fur dressing as soaking, it is impossible to carry out all the further stages of dressing the fox skin. In order to do it correctly, it is necessary to pour some water into a suitable large vessel (the temperature must be room temperature), throw ordinary salt (50g per 1 liter) and 10ml there. vinegar essence.

Formalin or furatsilin, taken little by little, may well serve as an antiseptic. Place the fox skin in this mixture and leave it to "swim" for 11-12 hours, do not forget to turn over. For better cleaning of the fur, it is advisable to add a little detergent to the solution.
Skinning and degreasing
Skinning is a thorough cleansing of the skin, in this case the skin of a fox, from fat, remaining pieces of meat and muscles. This work is very difficult, it requires a lot of attention and patience, especially if the skin is skinned in the abdomen. If the preparatory processing was done qualitatively, then the skinning will pass without problems.
When the dressing of the fox skin is carried out at home, all the necessary operations must be done in order. First, from the left leg, moving towards the middle, all the fat under the skin is removed. The same procedure is done with the right hind leg, moving in the same way, holding the skin by the rump during their actions.

Then this process continues in another part of the fox skin. We start from the front left leg to the head, then from the right front all in the same direction. Now the turn of the rump is coming: we turn the skin so that part of the head is in the right hand of the furrier, and the rump in the left. This area of the skin needs the following skinning sequence: from the right side towards the back right leg, after which they advance to the back left. The side on the left is processed in length.
It happens that the skin of a predator is very thin, when working with it, great care should be taken to prevent rupture of the skin.
Dressing fox skins by pickling
The pickling process has the ability to free the skins from excess substances that stick together the fibers during drying. For pickling, the fox skin must be placed in a solution of the following components: one liter of water, 4 tablespoons (without top) of salt, 2 full tablespoons of vinegar essence. The pickle temperature should be at the level of 18-20 degrees, but not more than 25.

The skin is immersed in the prepared solution with the skin outward and kept in it for 12 hours. Since the dressing of fox skins takes place at home, the container with the contents should be covered with a lid so that the smell of vinegar does not spread in the room. If the skins cannot be determined by thickness, then it is better to keep them in the pickel solution for less time, but in no case overdo it. Stir the solution with a stick or a wooden spoon, this must be done very carefully, because the skins become very tender after skinning.
After twelve hours of stay in the pickel, the fox skins are taken out, squeezed by hand and folded in half so that the skin is to the skin. In this form, they are sent to lie down, placing a load on top, and left in this way to “rest” for six hours (half the pickling time).
Drying skins with subsequent neutralization
To dry the fox skin, you have to work hard. You need to dry at normal temperature (room temperature), putting it on the rules so that the hairs look inward. As soon as the skin becomes semi-dry, it is removed from the rule and slightly wrinkled, stretching alternately in different directions. Actions are like washing a handkerchief. We must not forget about the part of the head, rump and legs, which are stretched across.
When, after kneading the skins, they become soft and fluffy, you can proceed to the following operations. It happens that some parts of the skin or all of it remains tough, then you have to do everything from the beginning (spread with pickle, put on the rule, dry and wrinkle). This must be repeated until each of the fox skins is soft and fluffy.

To achieve an increase in the durability of the quality of the fur, the skins must be neutralized after pickling. For this, hyposulfite is used. In a solution consisting of 50 g. hyposulfite, 30g. salt and 1 liter of water, fox skins can withstand 1.5 - 2 hours. After that, they are thoroughly washed, placed in cold water, gently squeezed and dried on the rule, while the core should be out.
Tanning
To make the fibers of the fox skin resistant to moisture, heat, chemical enzymes, it must be tanned. This is one of the skinning operations carried out at home, which is considered very responsible. Skins that have not been tanned do not tolerate moisture, they quickly begin to tear and become unsuitable for further use. Too retanned become stiff. Based on this, we conclude that tanning should be done moderately weak.
At home, for this purpose, willow and oak bark, or dry bergenia roots are sometimes used as a tanning agent (everything can be bought at a pharmacy). To prepare a tanning agent, you need to take one part of natural raw materials and three parts of water, boil for no more than 15 minutes, then leave to infuse for 24 hours. Strain.
 Tanning solution
 With a cold prepared tanning agent, using a brush, evenly saturate the core of the skin and send it again for drying. When, finally, they waited for the skin to begin to dry out, you need to wring it out, as before.
Fattening will “give” elasticity and softness
For the process of fattening, if it is carried out at home, quite affordable fattening emulsions are used. Some experts impregnate the skin with a mixture of one part glycerin and one part egg yolk. Another composition consists of 0.5l. ordinary water, 50g. soap, 0.5 kg. any fat, including fish oil with the addition of ten drops of ammonia. A certain proportion of fat is sometimes replaced with glycerin or yolk, it is possible (not more than 5%) with machine oil.
The mixture is evenly lubricated with the core of the fox skin stretched over the rule and sent to rest. After a few hours, they begin to dry the skin, again knead and comb the fur. In the event that it is dirty, wipe the dirty places with a cloth soaked in gasoline. To make the mezdra light and without excess fat, it should be rubbed with chalk. Over thick places you need to work with sandpaper, but this must be done very carefully so as not to overdo it.
Turn each skin inside out so that the fur is out. Then shake vigorously, holding the head and hind legs. That's all the work, the fox skin has been processed. You can start cutting and sewing the necessary fur products, which pleases the eyes with cleanliness and brilliance. He is so beautiful and fluffy that there is a desire to touch him at least a little.
In order to make the dressing of skins, both fox and other fur-bearing animals, easier at home, craftsmen come up with different devices, which ones you can see in the video.
If your friends find out that you can mend a fox skin at home, get ready to take orders. There will be a lot of people who want to use your services. If you can't refuse them, then do it for a fee. Among experienced professionals in this field of activity, skinning is valued at 20-50 dollars for one animal skin. You must evaluate your work adequately, do not sell too cheap. Otherwise, avid hunters will overwhelm you with their trophies! To facilitate your work, you can watch video tutorials on dressing fox skins.