After the long-awaited timber dwelling is built, it remains to complete the finishing work inside and outside the house. Most often, interior decoration is chosen with special care. However, before finishing the device, it is necessary to correctly arrange the main structural elements of the building, which include the rough ceiling along wooden beams.
Peculiarities
The basis of the draft ceiling, first of all, must be securely fixed. Various materials can be used to equip the draft structure, excluding plastic, chipboard, plywood sheets and materials containing resins.
It will not be difficult to arrange a rough ceiling with your own hands: it will only require care, basic woodworking skills and the necessary tools.
How to choose the right material for the draft ceiling
The draft ceiling vault in a wooden house is an integral part of the structure, forming the floor surface that makes up the ceiling base. It is on it that the finishing trim is subsequently mounted. The draft base is formed with the help of ceiling boards laid on the load-bearing floor beams.
You can hem the base using a variety of methods, as wooden beams can coexist with many materials.
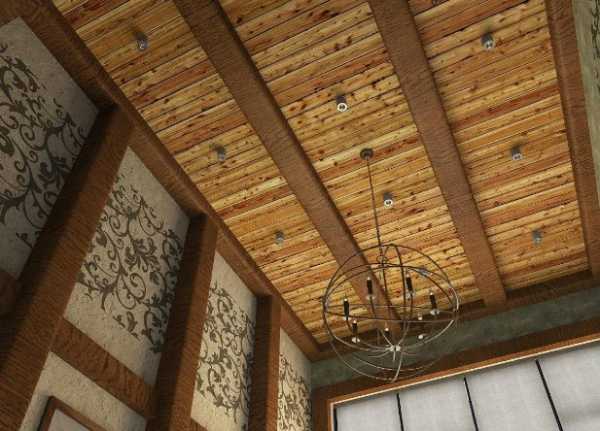
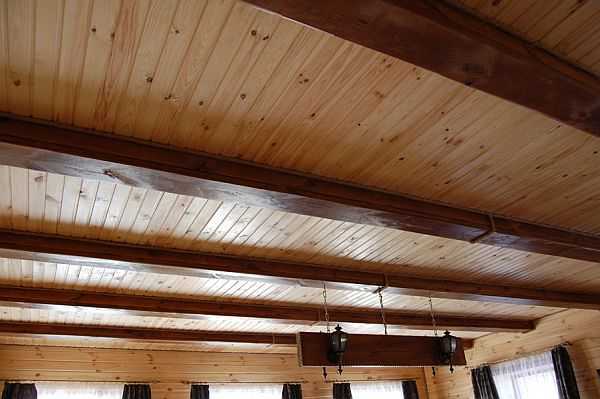
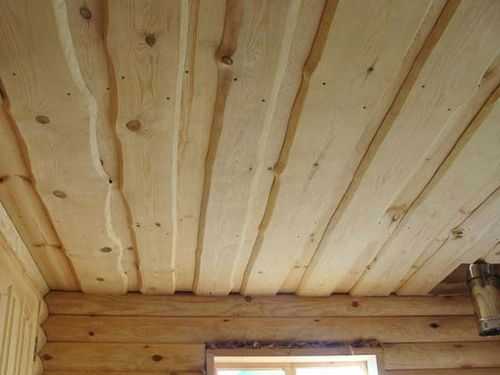
Ceilings with wooden floors are often arranged in wooden dwellings - in them the wood flooring coexists most harmoniously. In addition, structural beams are often used as an element of decor, highlighting them, for example, with a contrasting color.
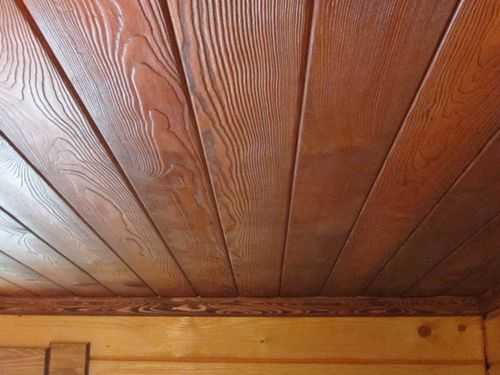
A sheathing board is often used for filing a rough base, which has high functional and aesthetic characteristics. Finishing with a planed board is a little less common - this option will definitely bring comfort to the interior, besides, natural wood has its own unique aroma - it brings a piece of nature into the atmosphere of the home.
Hemming the base is quite simple - this can be done with the help of craftsmen, and, with due effort, with your own hands. Before filing, the base must be insulated. The most popular type of insulation for ceilings is mineral wool. It should be remembered that the insulation layer necessarily needs a waterproofing layer - otherwise the insulation will quickly lose its functional properties.
In order to hem a draft ceiling, you must select a material that meets the following parameters:
- High moisture resistance;
- Resistance to negative temperatures (in case the dwelling will be operated seasonally);
- Resistant to temperature fluctuations.
For hemming the base in rooms with high humidity, plastic panels are most suitable, as they repel moisture, do not rot and are resistant to condensation.
The most common way of filing the ceiling base is boards. Drywall is less popular, besides, it is not used on loggias, terraces and gazebos. It is also necessary to carefully use drywall sheets in rooms with a high level of humidity - in this case it is better to choose varieties that are resistant to moisture.
Before mounting the GKL on the base, it is necessary to build a special metal frame, to which the sheets will subsequently be attached. Plasterboard filing is able to remove all irregularities and defects in the base, however, it is not recommended to carry out such a finish within 2 years from the end of the construction of the dwelling, since the house often shrinks, and the slabs can behave in an unpredictable way.
Plastic filing of the draft ceiling on wooden beams is a lightweight and easy-to-install material. Among other things, plastic filing has a large selection in terms of decorative properties. Long service life is another indisputable advantage of plastic. The gap between the ceiling finish and the walls can be masked using special ceiling moldings.
Draft ceiling device
If you plan to arrange a rough ceiling with your own hands, you must first take care of having all the necessary tools. This includes wood preservative, construction adhesive, flame retardant compound, finishing material, etc.
When it comes to choosing floor beams for the base, it is necessary to carefully check the raw materials for defects, mold and mildew. If defects or mold are found after purchase, it is necessary to treat the wood with an antiseptic solution, and putty chips and cracks.
In a wooden house, a draft ceiling can be made even on your own. To equip it, you need to carry out the following stages of installation work:
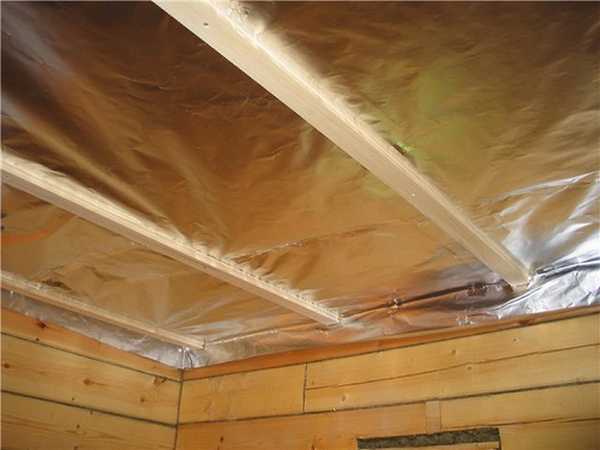
- First of all, it is necessary to close the beam structures from the side of the room with glassine or polyethylene film to create a vapor barrier. Fixing the material can be done using a construction stapler;
- After the first step, the beams must be hemmed with any material that is suitable for this purpose. Often, an edged board is used for filing beams;
- Further, a heat-insulating layer is laid between the supporting beams, which will prevent heat from being removed from the room. Most often, such material is foam, expanded clay or mineral wool;
- After laying the insulation layer, you need to put a layer of vapor barrier again. There are many varieties of materials for such purposes, and the most popular is polyethylene. However, it should be noted that membrane vapor barriers do their job much better, moreover, they do not interfere with natural air exchange.
- The final stage of arranging the draft base is the installation of a log along the floor beams, on which a layer of the subfloor will subsequently be laid.
It should be noted that the formation of the rough floor should be carried out taking into account the purpose of the attic, since there are some structural differences when arranging a residential attic and non-residential space:
 For an attic that is not planned to be made into a living space, it is worth adding aluminum foil to the floor layer - this method will reduce heat loss in the house. Waterproofing for the cold variety of the attic is a must. It can be done using ordinary polyethylene;
When arranging a residential attic, a gasket for sound insulation is added to the subfloor layer. The material is usually mineral wool or sawdust.
An important point - the boards for filing the draft ceiling are fixed on the logs with long nails, which are hammered into the spacer. Boards should be laid close to each other, leaving no large gaps.
Final Features
The condition of the ceiling is directly related to the microclimate of the room. The aesthetics of the finishing coating of the ceiling directly depends on the arrangement of the rough base. If it is done correctly, the room will be cozy and warm due to good heat and sound insulation. At the same time, the vapor barrier layer plays an equally important role - it helps to maintain the quality of thermal insulation, which directly affects the performance of the entire dwelling as a whole.
Video: draft ceiling
derevostroika.ru
How to make a ceiling in a bath: hemming, flooring, panel
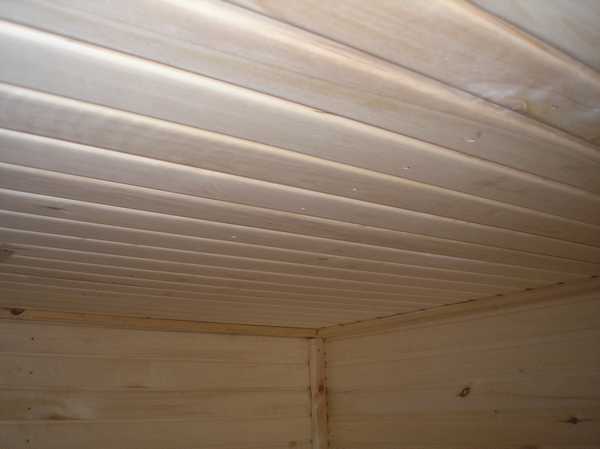
In the bath, traditionally, everything, or almost everything, we try to make from wood. It is understandable: beautiful, natural, healthy, creates an excellent atmosphere. And the ceilings in the bath are also made of wood. Someone from a cut or tongue-and-groove board, someone from a lining. But mostly wood.
wooden ceiling structures
The ceiling of boards and lining can be made in three ways. All of them have their own characteristics, advantages and disadvantages. A little more about each of them.
False ceilings
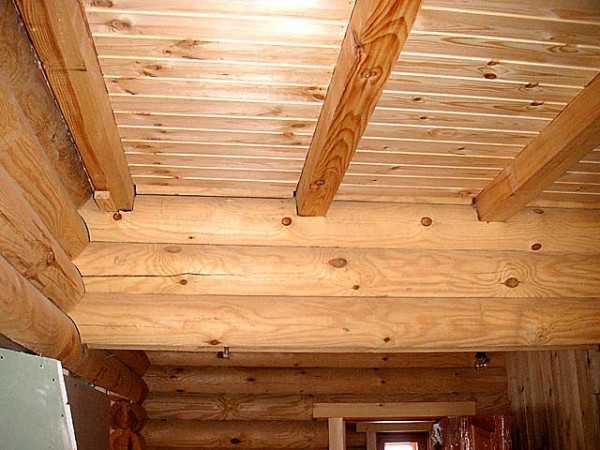
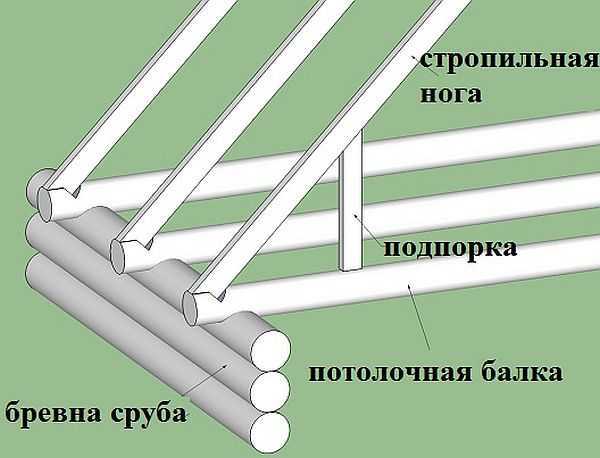
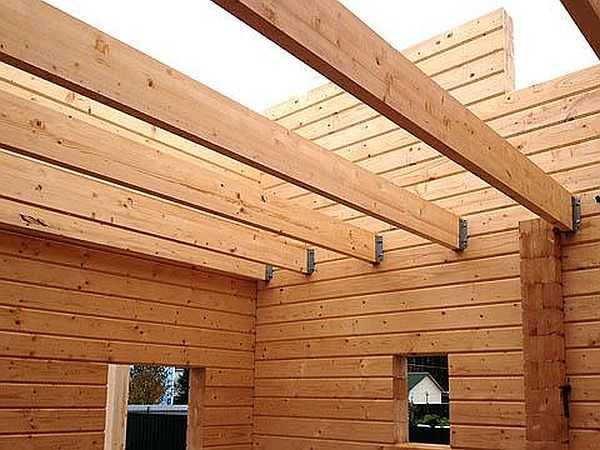
The most reliable, but, unfortunately, expensive option is false ceilings. The fact is that for their device it is necessary to lay floor beams: thick bars or hewn logs. And they are not cheap. They are laid on the upper crown or fixed in the wall - depends on the type of roof chosen. Ceiling boards are then nailed to the beams.
False ceiling - boards or lining are nailed to the floor beams
The construction is reliable. You can move freely along it, which can be useful in the repair or maintenance of the roof, chimney and truss system. It is convenient to make heat, steam and hydro-insulation on such a ceiling: you can walk as much as you need.
Their disadvantage is the following: the installation of powerful bars or logs is required, which significantly increases the cost of the structure. But if you make the ceiling with your own hands, you will not need to pay the brigade.
panel ceilings
For the manufacture of panel ceilings, panels are pre-assembled, consisting of two longitudinal support bars and transverse strips stuffed on them. Then all the necessary layers of the pie of insulation and vapor barrier are laid inside. And the finished structure is attached to the walls.
Such panels can be laid between floor beams or serve as a base themselves. In the second variant, powerful bars are used for the manufacture of panels: they must withstand the weight of the insulation and filing boards. The panels rest on the upper edge of the wall, nailed with long nails, then connected to the beams (if any) or to each other.
One of the panel ceiling options
The width of such panel panels is small, which allows the use of short boards that could remain from wall cladding. You can also buy lumber of substandard length, which will also save money.
The disadvantage of panel ceilings is the considerable weight of each shield. Even if the insulation and all other layers are fixed in place - on the ceiling, it is impossible to install such a structure alone. You need to work together, and better - three of us.
Decked ceilings
This type can be implemented only if the span length - from one load-bearing wall to another - is not more than 2.5 m. In this case, the boards are attached to two opposite walls. All insulation and waterproofing materials are laid on top, from the side of the attic. Everything is very simple and inexpensive: you can make such a ceiling in the bath with your own hands alone.
Floor ceilings are made with a distance between load-bearing walls of no more than 2.5 meters
The disadvantage of this option is the inability to walk on the deck. Even the flooring of an insulating cake can only result in damage to the fabricated ceiling. Any other work will lead to the same results. So this option, although economical, but impractical.
We make the ceiling with our own hands
Knowing the design features does not hurt, even if you hire a team of builders: it is better to control every step. This will guarantee that they will do the right thing for you. Well, if you decide to make the ceiling in the bathhouse with your own hands, then before you get down to business, you need to know in detail what, why and why.
How to make a panel ceiling
First, shields are made. Do it on level ground. Since the length of the shield is rather big - from one wall of the room to the other - they usually work on the ground. But you need to find a flat area or lay a large sheet of plywood, OSB, etc.
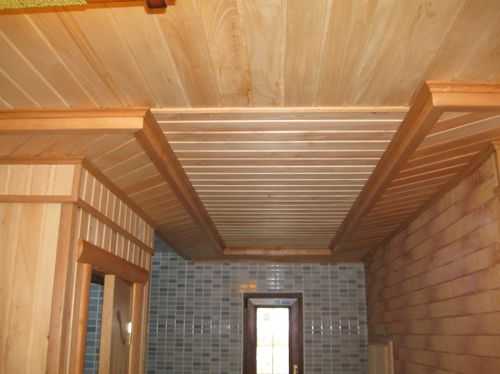
Panel ceiling option with decorative beams
Panel dimensions
If there are no floor beams, then the width of one panel is 60 cm. If the beams are installed and it is decided to make it not a hemmed, but a panel ceiling, then the width is selected depending on the installation step of the beams. If the distance is less than a meter, then you can make one panel, if more - make two.
The cross section of the bars also depends on whether there are beams or not. If there are no beams, the minimum beam size is 100*150 mm. The length of the bars is the distance from one wall to another, plus the amount of entry onto the walls - 10 cm each.
Shield making
We will describe the work for the case when there are no floor beams. If they are, they usually make a false ceiling. Two support bars are stacked at a distance of 50 cm, rest them on a flat bar. Along the entire length, the correctness of the set distance is checked. Boards 60 cm long are stuffed across the bars, leaving 5 cm of free edge on each side. This forms a gap, which, after installation, is filled with a heat insulator.
First they make panels, line them with vapor barrier, then fix them on the walls
For the crossbars, a lining or a grooved board is used. As an option - edged board with a selected quarter. All materials must be antibacterial treated. It is also desirable to impregnate with flame retardants.
You can fasten the strips either in the face - through and through, or in a secret way - in a spike or in a groove. Mounting in the face is the most reliable. And in order to disguise the heads of the nails, they are sunk into the wood with the help of a finisher. The holes are then puttied, and after drying, everything is compared with sandpaper with fine grain. If the color of the putty is chosen correctly, almost nothing is visible.
So that the putty does not differ in color and structure from wood, wood dust, which was formed when working with boards, is mixed into the finished composition. Such a putty is almost invisible even from a close distance, and on the ceiling it does not attract attention at all.

You can mask the hats of self-tapping screws or nails with putty on wood
A vapor barrier film is fixed on the downed panel. It is lined over the entire surface, entering the bar. It is fastened either with small nails or staples from a construction stapler.
Before you start lifting the panel, install a few jibs that will fix the shield in the correct position. At the end of the installation, the oblique bars are dismantled.
Installation and fastening
A jute tape is laid on the upper crown of the wall. It will serve as a heat and water insulator, as well as prevent wood friction during movements. The panel is laid on the wall, with a 5-10 cm approach, nailed with long nails. The first shield is still fixed along the long side - through the bar to the upper crown of the log house or bar. Beforehand, it is necessary to lay waterproofing between the bar and the wall - a double-folded roofing material, as well as a strip of jute tape.
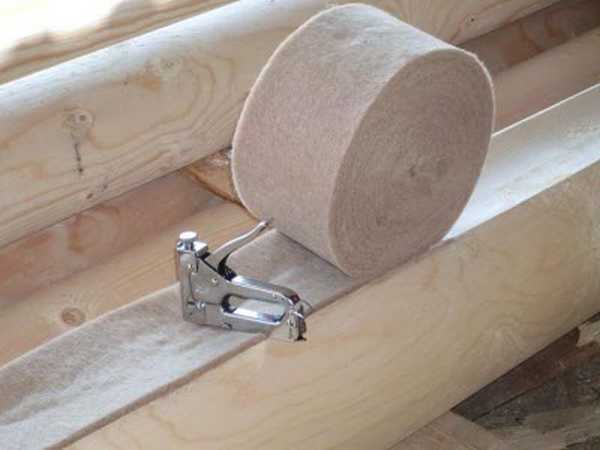
A jute tape is laid on the wall under the edges of the panel.
The next shield is installed close to the first. Between two adjacent bars, a gap of 10 cm is obtained - 5 cm from one and the second. This gap is covered with a vapor barrier, with a stop of at least 10-15 cm on the previously nailed strip. The joints are sealed with adhesive tape. Then the gap is filled with a heat insulator. After that, the panels are fastened together. Make it more convenient with the help of metal studs, washers and nuts.
As a heater for a bath - not in a steam room - you can use expanded polystyrene, and the ceiling of the steam room can be insulated with embroidered basalt fiber mats or some other natural insulation - expanded clay, for example.
In the presence of floor beams, the panels are attached to the beams, through the bar through and through. Long nails are usually used as fasteners. In this case, in the manufacture of shields, the transverse boards should protrude beyond the bar by a distance equal to half the width of the beam, plus 5 centimeters. Also, with this method, it is important to evenly set the panels from the side of the room.
After installing and fixing the panels on the walls, thermal insulation is laid in them, and waterproofing is placed on top of it.
Do-it-yourself false ceiling
Ceiling filing is quite laborious work. But it's easy to make it yourself. Work begins with the installation of beams.
floor beams
Their dimensions depend on whether the attic will be above the room, or living space. In general, there are special formulas and tables according to which the required parameters are selected, but for most medium-sized baths, a beam of 100 * 200 mm is taken for overlapping under the attic, and 100 * 250 mm for overlapping between floors. The installation step is 60 cm.
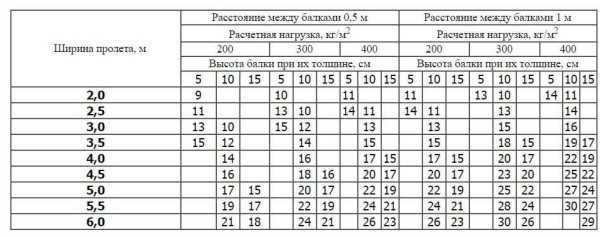
Table for determining the thickness of the false ceiling beams depending on the loads
Beams of large cross-section are not cheap, and are not always available. There is one trick that will save you money. They can be made from good quality edged boards. For example, beams of 150 * 250 mm are needed. You can take three or four boards with a width of 250 mm and a total thickness equal to or slightly more than 150 mm. For example, for our case, you can use three boards 50 * 250 mm. They are connected to each other with self-tapping screws on both sides, and then used as beams. The length of the self-tapping screws is at least 2/3 of the width of the future beam, i.e. 125mm or so.
If the boards are spliced (there is not enough length), the joints must be shifted relative to each other by at least 50 cm. At the joints, the boards on both sides are fixed with at least two self-tapping screws. Why not use nails? After shrinkage, they hold worse: they give more play.
One of the options for attaching beams
In terms of strength, spliced beams are in no way inferior to those made of solid wood. One caveat: you need to install them so that the face of the board looks sideways. That is, it is impossible to make a beam 150 * 250 mm from five boards 50 * 150 mm: its side surface must be solid.
You can also use glued timber. This is also molding spliced from separate pieces, but only manufactured in factory conditions. In the manufacture of glued beams, the wood fibers are placed in different directions, which prevents deformation. Therefore, it is distinguished by increased reliability, it does not crack and cannot be unscrewed with a “propeller”. But these bars are expensive.
Beams can be fixed like this
Beam installation
We mount the beams on the walls. In the upper crown, seats are prepared for the selected size of the bars. The first and last beams must be at least 5 cm from the wall. Accordingly, the next step can be slightly reduced to maintain this distance. Before laying, the ends of the bars are wrapped with roofing material (or dipped in molten resin). After installation, they are attached to the crown with long non-hardened nails driven in at an angle.
So that the nails do not rust for a long time, they are boiled in drying oil before use. Then and in a few decades there will be no trace of rust on them.
When mounting beams in a steam room or washing room, do not forget about the need to make room for the pipe to pass from the stove. How to correctly lead the pipe through the ceiling, read here.
Vapor barrier and crate
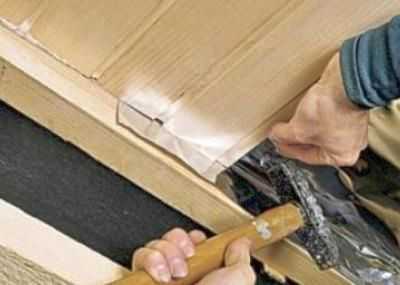
After installing the frame, you can begin the installation of the ceiling. First, a layer of vapor barrier is attached to the beams. This is a rather thin roll-type material, it can be foil-coated. It is rolled across the beams, fastened with brackets (it’s more convenient). One layer overlaps the other by at least 5 cm. The joint is glued with double-sided tape. Moreover, if a metallized vapor barrier was used (usually this is laid in steam rooms), it makes sense to use a similar adhesive tape.
A vapor barrier is attached to the beams from below. In the steam room, it is usually foil. Laths are stuffed on top of it - for better ventilation of the lining on the ceiling
Further, for better ventilation of the ceiling boards, it is necessary to create a gap: fill the strips over the vapor barrier. Their thickness is about 2 cm, the width is 3-5 cm, but the wider, the easier it will be to mount the boards (lining) on the ceiling.
Ceiling filing
Next comes the actual filing of the ceiling. It can be clean and rough. A rough ceiling is made if it is planned then to be sheathed with other finishing materials - drywall, plywood, plastic, etc. But for baths, this option is rarely used. Unless, to save money, the ceiling is sometimes hemmed with moisture-resistant plywood.
For a rough ceiling, an unedged board is suitable, with the board removed, treated with anti-bugs. For finishing use the following lumber:
- Edged board with a quarter removed or tongue-and-groove. The thickness of the board should be 12-18 mm. Lushe - 18: it will be possible to walk around the attic without fear.
- Lining or eurolining. It has a figured front surface. Way of connection - a thorn/groove.
You can fasten with ordinary nails, finishing (with a small hat) or self-tapping screws. If you fasten it into the face (through and through), then it is advisable to recess the hats, and cover the holes with putty on wood.
A hidden method of fastening is possible in the case of using a tongue-and-groove board or lining. In this case, nails (self-tapping screws) are hammered (twisted) at an angle into a spike or groove. The method “into the groove” is more common, but more reliable - into the spike. By driving a nail into a spike, you capture 2/3 of the thickness of the board, and this reduces the possibility of splitting during temperature and humidity deformations.
In order not to split the board or lining, if the nails are hammered into a thin edge, they first make a hole with a thin drill at the right angle.
Secret fastening method - nails or self-tapping screws are driven into a ridge or groove
The width of the board for filing the ceiling is desirable no more than 10 cm. It is clear that the wider the board, the faster the ceiling will be ready. But wider boards warp more. So 9-10 cm is the best option.
If the length of the board is not enough, you can splice it. But the joints should fall on the beams. Each end is fixed with at least two nails (self-tapping screws). The joint can then be masked with putty.
After the ceiling filing is completed, a ceiling plinth is nailed around the perimeter. It will hide the gaps between the ceiling boards and the wall trim. From above, from the side of the attic or the second floor, heat and hydro-insulation is laid.
Making a flat ceiling
This is the fastest version of the ceiling device, but the distance between the bearing walls cannot be more than 2.5 meters. Accordingly, the boards should have such a length. The minimum board thickness for a floor ceiling is 25 mm. Since there are no other supports, it is the ceiling that is the supporting structure: it bears the weight of insulating materials and people moving around the attic.
When installing a flat ceiling, the board rests on both walls. Therefore, the distance between them cannot be more than 2.5 m.
Boards are used either edged with a selected quarter, or tongue-and-groove. They are fastened to the walls by placing a layer of jute tape on the top crown. Docking a tongue and groove board can be problematic: the boards sag under weight. To make it easier to work, look for a spike not rectangular, but conical: it fits better into the groove.
Ceiling Lumber Processing
Everyone knows that wood is prone to rotting in a damp atmosphere, and bark beetles also love it. Therefore, it is impossible to use lumber without pre-treatment. Its fire-prevention impregnation is also desirable - with flame retardant compounds. But it is also clear that you really don’t want to use chemistry in baths: this is a place for healing, with which chemistry does not “fit in” in any way.
Chemistry may not be used, but there are folk processing methods that turn out to be no less effective. One of these is processing with hot drying oil and melted wax. When performed correctly, it is simultaneously protection against fungi, rot and bugs.
Read more about what kind of wood is better to use for the ceiling in the bath, read the article.
baniwood.ru
How to make a ceiling from boards
Recently, it has become especially important to decorate the interior with environmentally friendly materials. But in some cases, the use of wood becomes a necessity, not the desire of the owner. The use of wooden boards for a bath is one of the most popular solutions that you can do yourself. In this article, we will look at how to properly sheathe the ceiling of a house or bath with wooden boards on our own.
The main advantages of wood paneling
This option has for many years retained its popularity among people who decided to sheathe the ceiling of a bath or house. Wooden boards for the ceiling have certain positive features:
- High level of durability. This aspect is possible only with high-quality processing of the material;
- Excellent thermal insulation;
- Good sound insulation;
- Easy installation;
- Attractive appearance;
- A real tree helps to emphasize the individuality of the owner of the premises, confirms his good taste.
Due to the above features, ceiling boards in the bath are used especially often.
Each type of filing has negative sides, which must be taken into account when performing work. Wooden boards for the ceiling have the following disadvantages:
- low resistance to moisture and water, which has a strong effect on the deformation process;
- the detrimental effect of sudden temperature changes;
- the need to purchase special, non-aggressive detergents;
- rather high cost, especially when buying noble varieties of wood;
- discoloration that may appear due to poor processing quality.
These aspects must be taken into account without fail, only then you will be able to correct the processing option, which will help get rid of a certain number of difficulties in the future.
What material to choose
What boards for the ceiling to choose? This question is asked by every person who decides to apply this option in the interior of a house or bath. Any experienced master will tell you that there are no special "ceiling" boards yet. Therefore, it is necessary to consider some other types of wooden boards:
- lining;
- floor board;
- planken.
Each type has its own advantages and disadvantages that you need to study before buying.
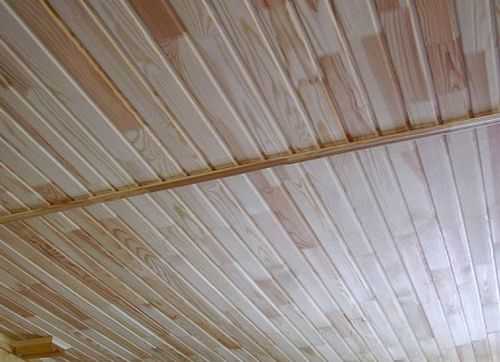
Clapboard lining
One of the most popular types of binders. Lining is a material that was intended for lining wagons, today it is widely used in construction and decoration. There are several classes of lining, the division occurs according to quality:
- The highest category A. It has the highest price, so not every person can use it for these purposes. If you want to create the perfect surface, this is the type to buy;
- Grade B. It may have a small number of defects that should not interfere with assembly and sheathing;
- Category C. The cheapest type. May contain not only defects, but the consequences of improper production.
Depending on your financial capabilities and goals, you can purchase wooden boards in the bath that will fully meet your requirements.
Floorboard hemming
Some builders specifically choose this type. After all, such a wooden board has excellent technical characteristics. With its help, you can get a smooth surface, since it practically does not have a strong relief. There are aspects to consider when buying:
- Do not purchase too thick a board for ceiling cladding; the best option is a material no more than two centimeters;
- You can use a solid parquet board. In addition, designers are advised to do this to create an original interior;
- Monitor the quality of processing.
Planken as an option for filing the ceiling
Planken ceiling boarding is the most innovative solution. Planken is a board that has gone through all the necessary processing steps:
- drying;
- heat treatment;
- hardening.
Under the influence of high temperature and pressure, the wood acquires good strength characteristics.

Planken's advantages are:
- very high level of strength;
- resistance to microorganisms;
- resistance to water and moisture;
- durability;
- wear resistance;
- attractive appearance;
- resistance to sudden temperature changes.
All this made the planken extremely attractive both in the eyes of professional builders and amateurs. Planken ceiling sheathing is a great option for decorating a bath or home.
How to hem the ceiling in a bath or house
So, you have decided to sheathe the ceiling with a board, now you need to prepare the tools:
- screwdriver;
- square;
- chainsaw or hacksaw;
- roulette;
- pencil;
- hammer;
- lacing.
The first step is to prepare and lay the insulation. Usually use vapor barrier materials. You also need to buy roofing felt, nails, fiberboard, insulation directly, and mounting foam.
So, below are the stages of work:
- we make high-quality vapor barrier;
- we lay the heater;
- we make a shield that places it perpendicular to the beams of the ceiling;
- soundproofing;
- crate;
- wood board cladding.
If you do all the work correctly and efficiently, you can significantly increase the life of the ceiling in the bath or house.
Before starting all the work, be sure to watch a photo or video in which an experienced master tells all the subtleties and nuances of the work. In addition, if your friends did such work on their own, then be sure to ask for advice or consult. This way you can avoid simple, typical mistakes.
Wooden boards for the ceiling is a great option for decorating the interior of a house or bath. You can combine different types and types of materials, thereby creating a bright and unique design of the room.
info-potolki.ru
You can't even make draft ceilings without mathematics!
Change text size:
We have already completed the construction of the roof and now we can safely do house work. In particular, rough ceilings and an attic.
As you remember, the truss system we have chosen is made in the form of the letter A. The slopes go in view of the rafter legs, and the horizontal plane is the beams that form the attic on one side and the basis for the future ceiling on the other.
Since on the ground floor the entire ceiling is formed by slabs, it is solid and requires only a fine finish. But on the second floor, the draft floor is formed by roof beams. Preparing the first floor ceiling was easy. In the future, we decided to make stretch ceilings (drywall and other types of finishes were abandoned in order to reduce the amount of work, as well as dirt in the house during installation). To do this, the joints of the plates on the ceiling of the first floor must be sealed (closed) with any mixture that will close the gaps so that debris from the second floor does not fall through them in the future. Of course, garbage will not pour in a stream, but in small specks and gradually accumulate behind a stretch ceiling.
So, buy alabaster in any hardware store - a building (or, as they say, white) mixture costs about 10,000 per 12 kg. We needed about five bags. In a plastic container, dilute it with water according to the instructions and cover all the joints between the plates with a spatula for 5 minutes. Instead of alabaster, tile glue is also suitable. But in any case, before starting work, carefully clean and moisten the surface so that the glue and the plates are well hooked onto each other.
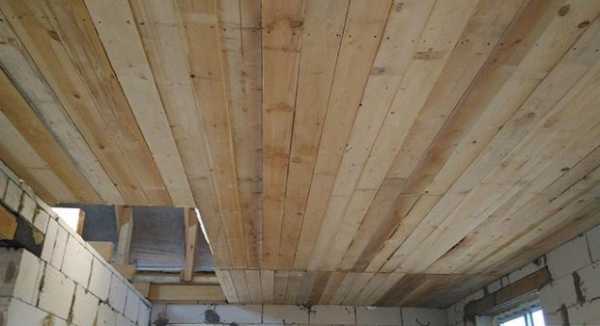
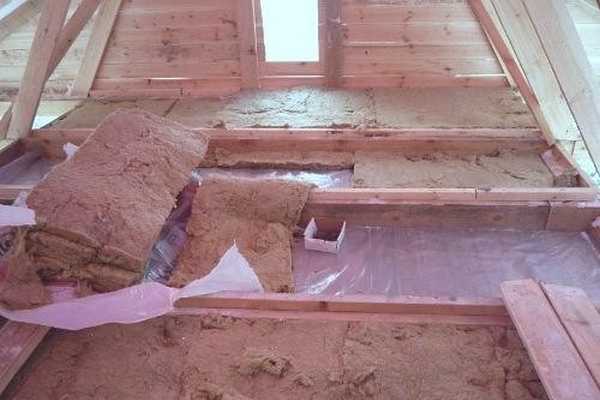
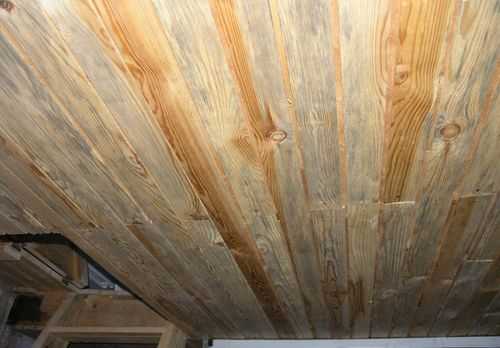
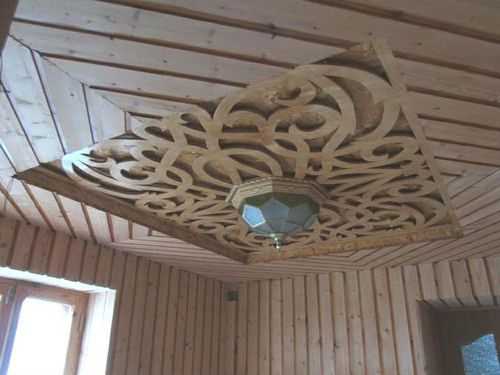
In the draft ceiling, they did without a solid board
But the draft ceiling on the second floor required much more work and materials. We will need a twenty-five edged board, as a rule, its stock remains after the construction of the roof, therefore it is not necessary to purchase it additionally. The board can often be with bark. To remove it, there is a special tool, but you can not buy it for a one-time job. I, for example, perfectly removed the bark with the back of a conventional hand saw.
COUNTER
How do you know how many boards you need?
It is clear that the amount of edged board that you need depends on the area of \u200b\u200bthe ceiling. How to calculate correctly? You can do it according to this formula: the area of \u200b\u200byour ceiling (hemmed) \u003d multiply the width by the length, then divide by 2 and again divide by the area of \u200b\u200bone board. Why is that? It's simple, the rough ceiling does not need to be hemmed with a solid board. We will hem the draft ceiling in increments equal to the width of the board (about 10 cm) - this will help save material. For example, how it happened in my case: 80 m2 the entire ceiling, divided by 2, we get 40 m2 and divided by the board area
(boards are 3 meters, and there are 2.5 m). We had a board of 3 meters. It turns out the area of \u200b\u200bone board is about 0.3 square meters. After all the mathematical calculations, it turned out that we need 133 boards. But, of course, you need to order boards with a margin - add another 10 - 15 pieces. But the tree is not sold in square meters, but in cubic meters! The volume is calculated by a simple formula: multiply the area of the desired number of boards by their height.
In our case, we got one cube.
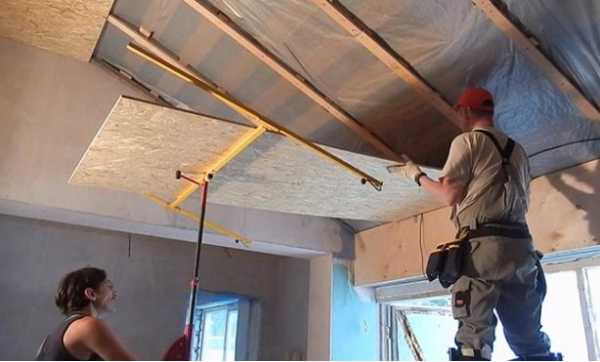
How not to spoil the climate of the future home?
The next necessary material is a vapor barrier film. You can buy it at any hardware store. Approximately 30 - 40 dollars for a roll of 70 - 80 squares. How much to buy? Depends on the area of the ceiling, but be sure to lay a margin for overlaps. In general, for a ceiling with an area of 80 squares, I took two rolls - such a film will always come in handy on the farm.
The peculiarity of the film is that it passes vapors in only one direction. Therefore, if you fix the vapor barrier incorrectly, your room will have dampness, high humidity, and cold will come from the attic - in a word, the climate in the house can seriously change due to incorrect actions. Usually the film has a smooth side and a rough side, the instructions indicate which side it should be attached to.
You will also need thermal insulation, mounting brackets and a construction (furniture) stapler. Recharge the screwdriver and do not forget the wood screws (I needed about 400 pieces). If your roof is cut in places, as in our case, then when buying a heater, consider the slopes - they need to be insulated immediately when you sew up the ceiling, otherwise you simply won’t get to them later. If your ceiling is completely rectangular, then you can simply lay the insulation from the side of the attic without too much fuss. You need to buy insulation with a minimum thickness of 15 cm (and even better - 20 cm). It fits tightly - from one rafter leg to another. Recall that we made the rafter step 60 cm precisely because the standard insulation (it doesn’t matter if it is in slabs or rolls) goes exactly this width: in this case it will be convenient to cut it. Recommendations for the layout of the insulation will always be written in the instructions for it. But it is important to always overlap: in this case there are no direct through joints between pieces of insulation. The fact is that over time, the insulation can clog, the joints between it will increase, and you will have to eliminate these gaps.
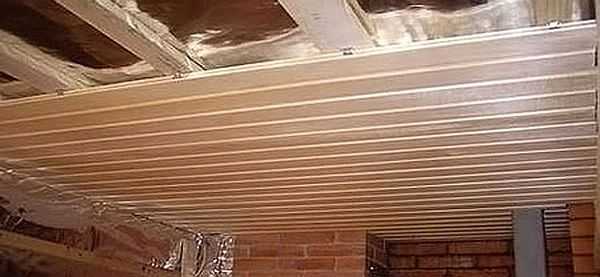
"Stepping on a hemmed board is FORBIDDEN!"
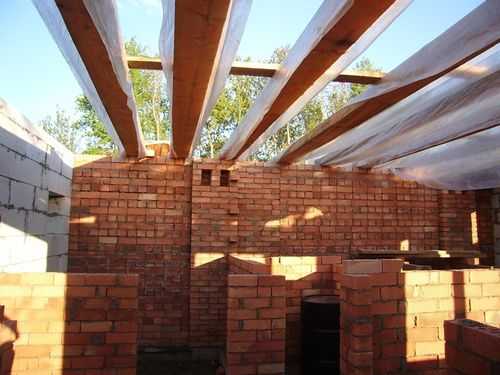
To deal with draft ceilings, you need two people and two days of time. So you can do it on your own. First, you build a reliable scaffolding that will allow you to reach the height you need (in our case, 2.7 meters). On the beams or rafters (if the roof is cut), you need to fix the vapor barrier with a stapler. Cut off a piece of film to the width of the room with a small margin. Then you take twenty-five and over the vapor barrier in the very corner of the planes (wall-ceiling) screw it to the beam with a screw. One screw is screwed into each beam (rafter leg) - this is enough. For a three-meter board, the number of screws is about five: we tested it under loads of 80 kilos - everything can withstand it! Then you take the second board and fasten it in increments of 10 cm. By the way, so as not to measure the distance with a tape measure each time, you can take a piece of twenty-five and use it to measure a step. Repeat this procedure until you reach the edge of the vapor barrier. Here, do not rush to wind the next board, take another piece of vapor barrier, nail it to the ceiling and only then close it with a board.
After you complete the filing of the draft ceiling, you can drag the insulation into the attic and lay it tightly, with overlaps. Remember: the role of the draft ceiling is to hold the insulation, not you. And therefore it is forbidden to step on a hemmed board - not only can you fail, but also damage everything that you have done. How to work? For example, in the attic between the beams we made flooring from boards or laid out pallets from under bricks.
If you have attic sections of the roof in the rooms, as we had, the insulation is laid as the ceiling is hemmed with boards - then it is extremely difficult to get to the bottom of the slope. The main advice: do not save on insulation and its thickness. A thickness of about 20 cm will be very good! In addition, if the insulation is in the form of plates (and they are more expensive than rolls), then it will be easier to work with it, and the thermal and physical qualities will be better. Since we have an attic in the garage and the garage is adjacent to the house, we performed exactly the same procedures there and hemmed the ceiling with a board.
"It is more convenient to hem the ceiling without partitions"
After you have completely hemmed the draft ceiling and figured out the insulation, you can report on the interior partitions. It is more convenient to hem the ceiling without them!
Interior partitions are made in half a brick from the same material as the main walls. They do not carry heavy loads, but they need to be done correctly so that someday this partition does not suddenly collapse. Sometimes interior partitions are made of drywall, but we chose brick. In the process of erecting the walls, the builders laid a special mesh for ligation of partitions with the main load-bearing walls.
What is important to remember:
In addition, lintels are needed above any doorway, but since the partition is half a brick and the dimensions of the lintel are small, you can ask the builders to fill in the lintel so as not to buy them separately at the factory. Well, keep in mind that builders consider the cost of partitions not in cubes, but in square meters: it turns out to be more expensive, which is sad, because this is not such an important element in the construction of a future house.
TOTAL: $890
black ceiling.